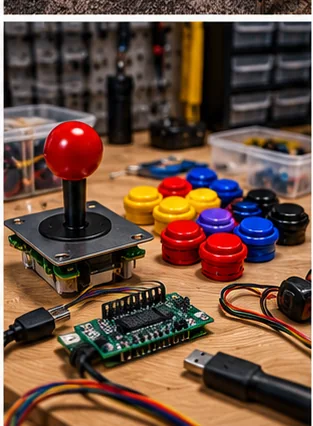
Products and configurations to compare
Sanwa 30mm pushbuttons
Sanwa's current catalog continues multiple 24/30mm pushbutton families, including newer silent elastomer options.
Best when: you are building a fighter/multicade panel with thin mounting material
Watch for: very light actuation can trigger accidental presses for heavy-handed players
Seimitsu 30mm pushbuttons
Seimitsu provides another proven Japanese standard and is easy to mix with LS-series joystick builds.
Best when: you want a Japanese arcade button with a slightly different actuation feel
Watch for: exact body/terminal style varies across the PS family
Happ/IL-style convex buttons
These are a better thematic match for many 1980s/1990s American cabinets than Japanese snap-ins.
Best when: you want a deeper American arcade panel feel
Watch for: long bodies need cabinet depth and use separate microswitches
Thirty millimeters is not universal
Japanese action buttons commonly use 30mm holes, but start/select/auxiliary buttons may be 24mm. American buttons use different hole/body assumptions. Drill only after the actual parts are in hand.
Snap-in versus screw-in is a panel decision
Snap tabs need a compatible thin panel thickness. Thick MDF can prevent them from locking correctly unless recessed. Screw-in bodies tolerate a wider thickness range but need clearance for the nut.
Silent buttons are a room feature
In a shared living space, reducing switch/impact noise can matter more than a subtle feel difference. Sanwa's current product line includes newer silent elastomer button families.
Microswitch serviceability favors modular designs
American-style buttons often let you replace the switch independently. Japanese integrated button switches are quick to replace as complete units.
Color is useful labeling
Use consistent colors for player actions and distinct start/coin/menu colors. A control panel that communicates itself is more guest-friendly than one designed only for aesthetics.
Control feel is a geometry problem
Joystick throw, engage distance, spring force, gate shape, shaft height and button actuation all change how a panel feels. Japanese fighting-game parts are deliberately light and fast; classic U.S.-style controls often feel heavier and longer. Neither is universally more authentic. The right control is the one that matches the game family and cabinet you are building.
Panel thickness matters too. A control that feels perfect in a thin metal arcade panel may sit too low when mounted through thick MDF without routing. Before ordering parts, measure the mounting surface and confirm the plate, shaft length and button-body depth.
Wiring should be serviceable
A good control panel can be opened without cutting wires. Use labeled harnesses, quick disconnects where appropriate, strain relief and a clear ground scheme. The first build may work with a tangle of loose jumpers; the tenth button replacement is when clean wiring pays you back.
Before checkout
- Measure final cabinet footprint and player standing space
- Measure the entire delivery route before ordering
- Confirm game list, control layout and number of players
- Check screen size and viewing angle from normal stance/seating
- Confirm Wi-Fi/Ethernet needs and whether online features are optional
- Price stools, risers, mats and surge protection with the machine
- Check warranty, freight damage and return terms
- Confirm replacement controls or parts are realistically obtainable
- Plan ventilation and service access
- Use only game/software content you have the rights to run
Installed cost: the part listings do not show
Budget freight or local pickup, stools or seating, floor protection, surge protection, network access, extension of an existing wired network where appropriate, and an initial parts reserve. If a machine requires permanent electrical work, treat that as room infrastructure rather than hiding it inside the cabinet price. A collection that arrives under budget but has no comfortable place to stand or sit is not actually under budget.
Measure the route with packaging in mind when a machine ships assembled or partly assembled. Door width is only one constraint; stair turns, ceiling height, railings, elevators and the ability to rotate a long cabinet matter. HomeArcadeGuide's doorway and shipping planners exist to catch those mistakes before freight arrives.
How to evaluate the purchase in the first week
Play the games and controls you bought it for, not only the easiest title on the menu. Test every direction/button, both players, audio at quiet and loud levels, network reconnect after power-off, display uniformity and cabinet wobble. If it is a virtual or software-driven platform, update only after confirming the current machine works and documenting its starting state.
Keep the carton and packing material until the return window and freight-damage inspection are safely behind you. Large arcade products are unusually expensive to return, and original packaging can matter if a display or control panel needs to travel for service.
Frequently asked questions
What size are standard fight-stick buttons?
Thirty millimeters is a common Japanese action-button size; 24mm is common for smaller auxiliary buttons.
Can I mount Sanwa buttons in MDF?
Yes, but panel thickness may require routing/recessing or screw-in variants.
Are silent buttons worth it?
For shared rooms and late-night play, yes; they can reduce mechanical clicking/impact noticeably.
Which feels more authentic?
Authenticity depends on the cabinet lineage: Japanese candy/fighter controls and U.S. arcade controls were physically different.
Primary/current sources
- Sanwa Denshi — current joystick/button product catalog
- Sanwa Denshi — company/product overview
- Seimitsu — LS-32 current dimensional documentation
Affiliate disclosure: HomeArcadeGuide.com may earn from qualifying purchases through Amazon Associates and eBay Partner Network at no extra cost to you. Manufacturer links in the source section are research references, not tracked endorsements.